
How I Made Wine From Fresh Grapes I Grew at Home

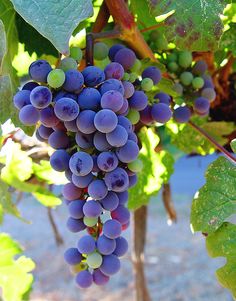
This summer I ended up with about 18 lbs of fresh grapes from just 1 grape vine I have growing – and there were still plenty left on the vine that I didn’t have time to pick (the same amount or more). I also didnt have time to make the wine immediately, so they sat in a loosely covered pail in a cool location for about 2 weeks, which was not the best thing to do – after picking the grapes you should either use them right away or freeze them. But things were hectic at the time, and this was the best I could do. As a result, I ultimately had to discard a certain amount of the grapes because they had started to spoil, which was unfortunate. I would say I lost about 1/16 of what I started out with – just a rough estimate, not sure how accurate. I ended up with about 1 gallon (4 liters or so) of grape juice from a little under 18 lbs of grapes.
When I finally had the time to deal with all these grapes, and after much study and investigation on how to make wine from grapes (everyone says to do it differently, and some instructions are so vague!), this was the process I used. I’m documenting how to make home made wine from grapes as clearly as possible, since I couldn’t find really good, easy to follow instructions anywhere, after hours and hours of frustration and searching – so I wrote them myself once I’d figured it all out!
Wash and Crush Grapes
 Wash the grapes and inspect the fruit, removing any grapes that are less than perfect. Look for signs of rot, over ripening, mold, or insect damage.
Remove Grapes from Stems and Put Into a Nylon Straining Bag in the Fermentation Bucket
Use a nylon straining bag (from a wine making store), or a sterilized new, unused pair of natural color nylon stockings in the sanitized fermentation bucket – instead of putting the grapes straight into the bucket, put the nylon strainer into the bucket first, and place the grapes into that. This will eliminate a lot of the hard work of straining the must and pulp from the juice.
If using nylon stockings, do not use dark colors – the dye could leach into the juice. I used natural beige. Stretch the waist band of the stockings across the opening of the pail (easiest to do if the stockings are wet), letting the legs of the stockings dangle into the bucket.
Whether you use new nylon stockings or an actual straining bag from a wine store, sterilize first by placing in a bowl of boiling water for a few minutes.
Remove the grapes from the stems and drop them into the straining bag or the legs of the stockings in the pail. Do this until all grapes have been de-stemmed and are in the pail. Be careful not to let any stems sneak into the pail – they will create bitterness in the wine. Seeds are fine (they provide the necessary tannin for the wine) as long as you dont get overly zealous in your grape crushing and split them, but if you follow the directions below that is very unlikley.
Using a sanitized potatoes masher or your (very clean and freshly washed) hands – I used both, – crush the grapes in the straining bag or stockings to enable the juice to be released. You don’t want to beat the grapes to smithereens, rather, just break the skins so the juice can release from the grapes.

Add Crushed Campden Tablet
Once you are done crushing, also crush 1 campden tablet if you have 18 lbs of grapes or less; you may need more campden tablets if you have a larger volume of grapes (a guideline is to use 1 campden tablet per 5 liters of juice and must). Sprinkle the campden tablet over the must in the straining bag or stockings (the “must” is the crushed fruit). If using stockings, sprinkle 1/2 the tablet over the must in each of the “legs” of the stockings. Lightly stir it into the must.
The campden tablets will kill off any unwanted bacteria caused by nasties such as bugs or mold that may have sneaked past you.
Now you need to set your fermentation pail aside for 24 hours to allow the campden tablet to do what it needs to do – so wait 24 hours before adding yeast (but there are other things to do along the way before the yeast, so keep reading!).
(Edited to Add) Add Pectic Enzyme
I didnt actually do this in this order, but I am editing to add this now that I realize it would have been preferable – add the pectic enzyme immediately after crushing the grapes; basically at the same time as adding the campden tablet.
Cover the Fermentation Bucket with Breathable Cloth and Wait
Cover the fermentation bucket with cheese cloth or other light breathable cloth and set aside for 24 hours before adding yeast and yeast nutrient, which can be added at the same time as eachother (some people add the yeast nutrient 12 hours after curshing the grapes, and then the yeast 12 hours after that).
The cloth will keep fruit flies or other insects out of the bucket (right now I have a few end of summer lady bugs wandering my home – I dont know how they get in, but I actually dont mind the little critters 🙂 However, you dont want to use the plastic lid from your fermentation bucket, because it needs to be able to ventilate, so that the gases from whatever is being killed off by the campden tablets can be released, otherwise you are defeating the purpose of using the campden tablets to get the nasties out.
At this point, I will admit that I snuck at taste of the grape juice, and it was yummy! I was relieved, because honestly, the smell coming from the bucket was not great. It didnt smell at all like grape juice, rather it had a very earthy, organic smell and I wasnt sure if maybe the grapes had really gotten too old as they sat around in that pail waiting to get used for a couple weeks. I had visions of going through all of this hard work to make the wine, only to find out a year later when it was finally ready too sample that it all had to be dumped because the grapes were bad. So I figured before going any further, I’d better taste it. Wow, I was very pleasantly surprised, and highly relieved. It tasted way better than it smelled.
I also decided to taste it because I read one set of fresh grape wine instructions that said to always add 1 cup of sugar to the must at this point unless you want a very dry wine. I was all set to do that, and then second guessed it – I didnt want to end up with an overly sweet wine. So I got brave and tasted the juice (fully prepared for something very yucky based on the smell). Thank goodness I didnt just follow the advice to add that sugar – the juice had a lovely level of sweetness. I called my husband over and he concurred – he agreed it was perfect as is – any added sugar could risk making it too sweet. I was quite surprised at how lovely this juice was, with just the right level of sweetness, since when ever Ive tasted these grapes off the vine, they are quite sour.
Measure Sugar Content 24 Hours After Crushing Grapes
After allowing the campden tablets to do their thing killing off bad stuff for 24 hours, its time to measure the sugar content in the juice, using a hydrometer, to determine whether you need to add sugar to creating a higher alchohol content, or water to lower the alcholhol content of the finished wine.
If you dont have a hydrometer you’ll just have to wing it (thats how they did it in the old days), and you’ll get what you get. But if you want to have control over the alcohol content of the wine, the hydrometer is the way to go so you dont end up with something you are disappointed with after all this effort.
Using your hydrometer, take your initial gravity reading – you are ideally aiming for approx. 1.078 (settle for anything between 1.080 and 1.090). Depending on your grapes, you will need to either add filtered or bottled water, or sugar to adjust it to the right level. You will often find it is more likely to be around 1.040, or approximately half of what is ideally needed. If not at least 1.095, add sugar (its best to mix it into some of the juice in a seperate container and stir until dissolved before adding it to the must). If you do need to add sugar, then you can work out how much by using this table:
| Hydrometer readings and sugar content of wine | |||||
| Specific gravity | Potential alcohol % | Grammes of sugar per litre | Specific gravity | Potential alcohol % | Grammes of sugar per litre |
| 1.010 | 0.9 | 12.5 | 1.060 | 7.8 | 157.5 |
| 1.015 | 1.6 | 25 | 1.065 | 8.6 | 170 |
| 1.020 | 2.3 | 44 | 1.070 | 9.2 | 182.5 |
| 1.025 | 3.0 | 57 | 1.075 | 9.9 | 195 |
| 1.030 | 3.7 | 76 | 1.080 | 10.6 | 208 |
| 1.035 | 4.4 | 95 | 1.085 | 11.3 | 225 |
| 1.040 | 5.1 | 107 | 1.090 | 12 | 240 |
| 1.045 | 5.8 | 120 | 1.095 | 12.7 | 252 |
| 1.050 | 6.5 | 132 | 1.100 | 13.4 | 265 |
| 1.055 | 7.2 | 145 | 1.105 | 14.1 | 277 |
So, for instance, if you have 5 litres (1 gallon) of juice, with a reading of 1.040 and you want to add sugar to bring the reading up to 1.090, you can calculate the sugar required using the following formula:
(Sugar required – sugar present) x volume in litres
So in this case: (240 – 107) x5 = 665g, so 665g of sugar need to be added to 5 litres of juice.
When we used our hydrometer, the reading was 1.078 (which corresponds to 180 grams of sugar per liter) and 10.8% alholol, but it needed to be at 12% (it needed to move from 180 grams of sugar per litre – where it was at – to about 200 grams per litre of sugar. So we added about 100 grams of sugar (1/2 cup) because we belived we had 5 liters of juice. In fact, it turned out we had more like 4 liters of juice when we removed the bags of must. So to compensate we added 2 cups of water (1/2 liter) because we were just over 5 liters with the bags in – with the bags out we were at about 4 liters, so it looked like it needed aproximately 1 liter of water to bring it back to 5 liters that we thought we had. But we were afraid of putting in too much water and diluting the falvor too much. So we decided to split the difference and add 1/2 litre.
Oddly, when we retested the hydrometer reading right after, and it remained virtually the same. So then we ran an experiemnt to ensure the hydrometer was working, and not just stuck, and it was working all right, so at that point we figured we’d leave well enough alone and decided ‘we get what we get’.
Measure Acidity
You can also measure the level of acidity the wine will have using a titration kit (which I did not know, so I do not have one). The acidity should be somewhere between 6.5 and 7.5. If it’s much lower than 6.5 you may need to bolster the must with some tartaric acid. (To lift the acid profile of a wine by 0.5g/L you will require half a gram per litre, so 4.5 grams for 9 litres.) Again, I didn’t know about this until the process was under way, and didn’t have a kit, so I didn’t do this. Many wine making instructions mention nothing about measuring acidity, I presume they didn’t do this in the “old days” (like when our parents made wine, because I never heard my mom or mother-in-law talking about this), so I figure we’ll get what we get. As it is, I know often we buy a bottle of wine and get terrible heart burn, so the acidity is obviously not optimal. Just the other day my husband was recalling the terrible heart burn he had after drinking a glass of $100 per bottle fine wine when he was 19. So if my acidity level isn’t optimal, neither is the $100 a bottle stuff!
What Do Now?
Next, I needed to determine how long to wait to add the yeast after adding the yeast nutrient. I searched high and low online and all I could find was the instruction to add it “before” fermentation. Yes, but how long before? Immediately before adding yeast? COuldnt find the answer anywhere, crazy! In the process, however, I did discover I’d already missed a step along the way, but it wasnt too late to salvage the situation.
Apparently, ideally the pectic enzyme should have been added right after crushing the grapes. Makes sense since its purpose is to help breakdown cell walls and release juice, making it available to be fermented. Well, I’d crushed my grapes over 24 hours ago, and they’ve been sitting in the fermentation bucket, with a crushed campeden tablet ever since (because I did read to wait 24 hours after adding the campden tablet before proceeding with yeast). Luckily, although its ideal to add the pectic enzyme as soon as the grapes are curshed, it wasn’t too late – as long as the yeast hasnt been added, there’s still time to add the pectic enzyme and if you give it sufficient time (like 12 – 24 hours), it will do its thing (by the way, another purpose of pectic enzyme is to help clear the pectin from cloudy wine, so for this purpose, some people add it when bottling – but if you’re using it to help release juice, its got to be done around the time of crushing, and before the addition of yeast). Next time, however, I will know to add it immediately after curshing the grapes and adding the campden tablet. So, needless to say, I immediately added the pectic enzyme after reading this. I also read elsehwhere that “Pectic enzyme will NOT work effectively (in terms of breaking down the fruit and releasing juice) in the presence of an active yeast fermentation” and that therefore, you need to wait 12-24 hours after adding the pectic enzyme before adding yeast, so that confirmed, I’ve still got another 12 hours to go before I can pitch my yeast. By the way, I also read that Pectic enzymes only function to break down the skins of fruit at temperatures from 20 to 40 degrees Celsius, so a warm, not cool, environment is needed when you add the enzymes to your fermentation bucket.
I also added the yeast nutrient immediately after the pectic enzyme and continued searching for info on whether I needed to wait any particular amount of time to add the yeast, or just go ahead with it.
Incidentally, I just read that Pectic enzymes should be stored in the fridge – which is a little wierd since at the wine making supply store, they have the packages just sitting out on the shelf….
Finally, I’ve come across this: “Place bags of pulp in primary and add sugar already dissolved in water, nutrient, and crushed Campden tablet. Cover securely with clean cloth and set aside. After 12 hours add pectic enzyme and recover. After additional 12 hours check specific gravity. If not at least 1.095, add sugar and stir until dissolved, then add yeast. Stir daily, squeezing the nylon bags to aid in juice extraction, and check the S.G. When S.G. reaches 1.030 (5-6 days), lightly but steadily press juice from bags”.
Okay, so things are still a little out of order, but I’ll wait 12 hours before adding pectic enzyme, based on this guidance, and what I’ve already done.
I finally found the answer about whether the yeast nutrient and the yeast are added at the same time, or whether you have to wait to add yeast after adding the yeast nutrient – turns out according to this link you can add the yeast directly after the yeast nutrient, or essentially, at the same time. It says: “It’s also recommended that you add yeast nutrient, which will enable the yeast to start fermenting more quickly and give you the best yield. Simply stir in the correct amount of nutrient and yeast, directly onto the juice and pulp mix (called the must), give it a stir and cover. After a day or so, the mix should start fizzing and froth will appear on the surface of the must. This is the most active stage of fermentation and will last about a week or so. Keep the mixture at 18-22°C.”
Add the Wine Yeast & Let the Fermentation Begin
Add the wine yeast according to the manufacturers directions OR you can just sprinkle the packet of yeast over the juice and must. A well detailed explanation of the two approaches is here – its worth a read because as it explains, if you’re going to follow the package directions on the wine yeast, you must follow them exactly. Really, really precisely – do anything other than the exact way they tell you and you may start killing off the yeast and your wine will fail to ferment properly. So that’s why sometimes its better to just sprinkle the package over the contents of the fermentation pail – its much simpler and less room for error. It may take longer for the fermentation process to begin that way, but it will begin nonetheless and you don’t risk damaging the yeast. In the future, maybe I’ll just go that route, because I did slightly get the instructions on the package of yeast a little wrong, and then I got worried (that’s how it came about that I found the above mentioned article – I was trying to figure out if I’d totally buggered everything up). I do suggest reading the article before adding your yeast, or just simply sprinkle it over the stuff and disregard the package directions: Adding Yeast To Homemade Wine: Dried vs. Rehydrating .
Now be patient and wait.
After a day or so, your future-wine should start fizzing and froth will appear on the surface of the must. This is the most active stage of fermentation and will last about a week or so. Keep the mixture at 18-22°C.
One set of instructions I read said to do this after adding yeast: “Stir daily, squeezing the nylon bags to aid in juice extraction, and check the S.G. When S.G. reaches 1.030 (5-6 days), lightly but steadily press juice from bags”.
I’m not sure on that. I need to research that a bit more, because other instructions don’t say anything about stir daily.
Straining and Secondary Fermentation
After a week, it is time to separate the pulp from the juice. Use a muslin straining bag (boil it for 5 minutes to sterilise it first), or a sterilised kitchen strainer and a funnel, straining the juice into a sterilised demijohn. If using a muslin bag, give it a good squeeze at the end, to extract as much juice as possible. The demijohn should be filled to within two inches (5cm) of the neck. Fit a bung and airlock to the demijohn and half-fill the airlock with water. Allow the must to ferment out at 18-22°C, which will take another 2-3 weeks.
Racking the Wine
After 3 weeks, all fermentation should have completed, with no more bubbles rising and no fizzing at the surface of the liquid. If there is still signs of activity, then leave it longer. If fermentation has stopped, then it’s time to rack (transfer) the wine off the sediment, into a clean, sterilised demijohn, using a sterilised piece of siphon tubing. A racking cane with a sediment trap will help you transfer the maximum amount of wine, without sucking up any sediment. Take a hydrometer reading and make a note of the finishing gravity (FG).
You can now work out the alcohol content of your wine, using this formula: Alcohol by volume = (Starting Gravity – Finishing gravity) x 131.25
Leave the wine for two to three months, by which time a second sediment should have formed. Rack off the sediment into a clean, sterile demijohn. The wine may have started to clear at this point, but if not, move it somewhere cool to continue clearing. If it hasn’t cleared after 2 months, then it will need some help in the form of finings.
Adjusting the Taste
Many wines will ferment out dry, in other words, the yeast will use up all the available sugar, turning it into alcohol. Before bottling, you should taste your wine and determine if it is to your taste, or if it is too dry. Some hydrometers come with markings indicating the level of sweetness, but if yours doesn’t, then use this as a guide:
- Dry 1.000 to 0.0990
- Medium: 1.005 to 0.995
- Sweet: 1.015 to 1.005
If you wish to sweeten your wine, then you will with either need to ensure there is no more active yeast around to restart fermentation, or use an artificial sweetener. If using sugar, to prevent fermentation starting again, use fermentation stopper(Potassium sorbate), sometimes called wine stabiliser. Add a small amount of sugar and re-taste. Keeping adding small amounts of sugar until the desired amount of sweetness is obtained. Remember, you can sweeten a dry wine, but you can’t make a sweet wine drier!
Bottling Your Wine
Once your wine has cleared, it is time to bottle it. A full demijohn will fill 6 standard wine bottles. Sterilise all the bottles, corks or caps and your siphon tube. Siphon carefully into each bottle, leaving any sediment behind in the demijohn. If using corks, allow the bottles to stand upright for 24 hours, before storing on their sides. Corks must be kept in contact with the wine, to ensure they stay wet, otherwise they can shrink and allow oxygen into the bottle, which will spoil the wine.
Aging the Wine
Your wine may be ready to drink at this stage, but most wines will benefit from being allowed to mature. How long is up to you, but most home brewed wine will benefit from at least one year’s ageing.
~~~~~
Re-Using the Wine Must for a Second Fermentation (A Second Batch of Wine!)
I discovered that I could re-use the wine must to make another batch of wine using this recipe below, which I thought was pretty cool. So today (Sat, Nov 19, 2016), after we siphoned our wine from the primary fermentation bucket into the 1 gallon wine jugs I scored second hand a couple days ago (just in time!), I went straight back to starting another batch with the same must. When doing this, its important to do it right away the same day so that the must doesnt start to dry out or go moldy, so I was back at it within hours of transferring the first batch into the jugs (our secondary fermentation containers).
Here’s the Recipe for the Second Fermentation:
INGREDIENTS:
pulp from 6-10 lbs Concord grapes
1 gallon (minus one cup) water (1 gallon = 16 cups, so use 15 cups)
8-10 oz red grape concentrate or Concord grape juice
2 lb granulated sugar (4 c. in a lb.)
2 tsp acid blend or juice from 1 lemon and 2 thin slices of winesap apple
1/8 tsp tannin or 1 used teabag
1/2 tsp yeast nutrient
wine yeastMETHOD:
Begin this wine as soon as practical after pulp is removed from previous use, as you will be using the yeast already present in the pulp (do not allow pulp to dry out). Mix all ingredients except pulp in primary, stir well to dissolve sugar, then add pulp still in nylon bag. S.G. may be lower than expected because of alcohol still trapped in pulp. Cover and ferment, stirring and squeezing bag daily, until S.G. drops to 1.010. Siphon liquor into secondary. Squeeze bag well to extract all juice possible. Add juice to secondary and fit airlock. Rack after 30 days, then every 2 months until wine is clear and no more yeast deposits form after 10 days. Stabilize, sweeten if desired, and siphon into bottles. Taste after two years.
Turns out I didnt use the tannin or a tea bag. I sent my husband to the wine making store this afternoon, and he came back with the tannin, but also after having a discussion with a knowledgable guy at the store, he reminded me that tannin is what actually gives women headaches after drinking red wine – and I’m one of those women. They guy didnt think we needed the tannin since its already naturally in the grapes. I figured the recipe was calling for a booster since it was the 2nd fermentation. My husband had told him that, but the fellow still didnt think we needed it. He said, if anything, just use half the amount. Ultilately, I choose to skip the tannin.
I also did things a bit differently – I added a campden tablet even though the recipe didnt call for it – but I know campden tablets will kill off any bad bacteria, and since I’m re-using must, I thought it was a good idea. This time around I added the yeast nutrient and pectic enzyme all at the same time after crushing the grapes (last time I didnt add yeast nutrient until I was adding the yeast, which was 24 hours after crushing the grapes and adding the campden tablet. Last time I also waited 12 hours before adding the pectic enzyme, but then read it should be added right after crushign, whcih made sense, so thats what I did this time around. Now that leaves us with just waiting out the 24 hours to add the yeast.
I wasnt going to use a full pack of yeast since I’m only mkaing about a gallon of wine, and I discovred that one pack of yeast will do up to 5 gallons of wine, so with some research I learned that you can use the whole pack when making under 5 gallons, and most people do toss the whole thing in, you can actually divide it as long as you are using the other half right away. Turns out my husband managed to pick another whole bag full of grapes off the vine the other day, so I was starting another batch from scratch (using a slightly different recipe this time, it follows below); I was going to use 1/2 the package of yeast for the second fermentation I was starting from the re-used wine must, and then use the other 1/2 of the pack for this new batch I was doing from fresh grapes. But once again i got something wrong with the yeast (rehydrated it way too soon for the new batch), so I ended up pitching it into the second fermentation, and I’ll use another pack tomorrow when its time to add yeast to the new batch from scratch. Sigh… it would have been nice to conserve on the yeast and get two batches from the one pack (since all my batches seem to be about a gallon).
So this is the new recipe I am using for this new batch from scratch with fresh grapes (as you can see, unlike my other recipe as documented above, this recipe calls for adding water and sugar to the must; I liked this idea because I figured it would yield more wine….):
INGREDIENTS:
- 6 lbs fresh Concord grapes
- 5 pts water
- 3-1/4 cups granulated sugar
- 1/2 tsp pectic enzyme
- 1 crushed Campden tablet
- 1 tsp yeast nutrient
- wine yeast
METHOD:
Wash and de-stem grapes, discarding any less than perfect ones. Put in nylon mesh bag, tie securely, and vigorously crush grapes over primary, being sure to crush them all. Place bag of pulp in primary and add water, sugar, nutrient, and crushed Campden tablet. Stir well to dissolve sugar, cover securely with clean cloth and set aside. After 12 hours add pectic enzyme and recover. After additional 12 hours check specific gravity. If not at least 1.095, add sugar and stir until dissolved, then add yeast. Stir daily, squeeze the nylon bag to aid in juice extraction, and check the S.G. When S.G. reaches 1.030 (5-6 days), lightly but steadily press juice from bag. [Set bag aside in bowl to make a second wine (see third recipe below).] Siphon liquor off sediments into sterilized glass secondary and attach airlock. Check S.G. after 30 days. If 1.000 or lower, rack into clean secondary and reattach airlock. Rack again after 2 months and again after additional 2 months. Allow to clear, stabilize, sweeten if desired (1/2 to 3/4 cup sugar syrup per gallon), and rack again into sterilized bottles. Allow to age two years in bottle before tasting. Improves further with additional aging. [Adapted from Raymond Massaccesi’s Winemaker’s Recipe Handbook].
Its weird, but the color of this must is different than te beautfiul red must i got right away from te first batch of grapes. This time its sort of grey-brown looking – relaly not attractive at all. Hard to picture it becoming wine. But as the hours tick by, I squeeze the bag a few times, and over time, its slowly turning more reddish in color (meanwhile the second fermentation Im doing on the first back of must is also producing a beautfu red color.
To be continued tomorrow as the process goes on… come back and follow along 🙂
Note: I found this tutorial to be particularly informative in figuring out how to make wine from grapes, and this one as well (this one shows how you can re-use the must for a second fermentation as soon as you’ve racked the first batch of wine! Cool! Gonna do that!


Leave a Reply